Car Leather Seat Repair Guide: Kits, Costs & Tips
Published: 13 Jun.2026
You slide into your car, glance down, and notice it — a crack running across the driver’s seat, a small rip along the bolster, or peeling leather that makes your interior look ten years older than it is. Sound familiar?
Here’s the good news: car leather seat repair is one of the most rewarding DIY projects you can tackle. A quality repair costs a fraction of reupholstering, takes just a few hours, and — when done right — can make your seats look nearly new again.
This guide covers everything your competitors leave out: what type of damage you actually have, which products work for which situations, honest cost breakdowns, when to go pro, and how to avoid the most common mistakes that turn a $30 fix into a $300 disaster.
Identify What You’re Actually Dealing With
Before buying anything, you need to correctly diagnose your seats. Most guides skip this — and that’s why people buy the wrong product.
Real Leather vs. Faux Leather (PU/Vinyl)
This is the single most important distinction. Many “leather” car seats are actually PU leather, bonded leather, or vinyl — especially on seats older than 5–7 years or non-premium trims.
How to tell the difference:
- Run your fingernail gently across a hidden area. Real leather flexes and feels organic. Faux leather often flakes or has a plasticky texture underneath.
- Check the owner’s manual. Terms like “leatherette,” “SensaTec,” “NuLuxe,” or “MB-Tex” all mean faux leather.
- Real leather develops a patina over time; faux leather cracks and peels in chunks.
Why it matters: Leather repair kits work differently on genuine leather vs. vinyl/PU. Using a leather filler on badly peeling bonded leather is a temporary fix at best — the delamination will continue underneath.
Types of Damage at a Glance
| Damage Type | Severity | Best Fix |
| Surface scuffs | Low | Leather conditioner or recoloring balm |
| Small cracks (hairline) | Low–Medium | Leather binder + filler + color coat |
| Deep cracks | Medium | Flexible filler + texture grain + color |
| Small tears (<2 inches) | Medium | Sub-patch + filler compound |
| Large rips or holes | High | Canvas backing patch + compound + color |
| Peeling / delaminating | High | May require professional or reupholstery |
| Faded / discolored | Low | Recoloring balm or leather dye |
What’s in a Car Leather Seat Repair Kit?
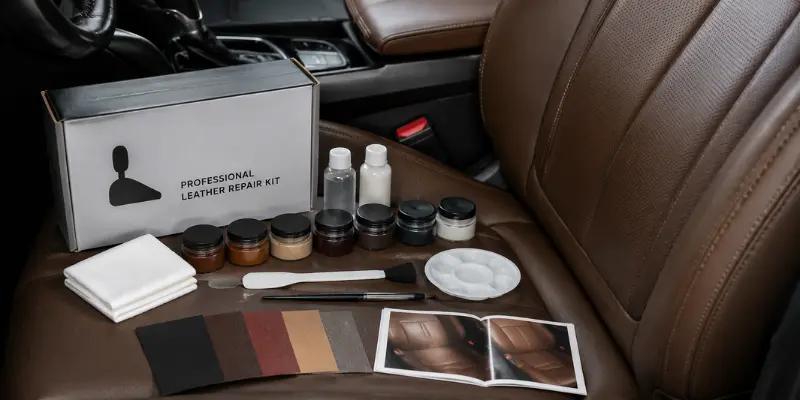
A good car leather seat repair kit typically includes:
- Leather filler/compound — fills cracks, tears, and holes
- Flexible canvas or backing patch — used under large tears as an anchor
- Grain texture pads — pressed into wet filler to impart matching texture
- Leather dye or colorant — tinted to match your seat color
- Leather binder — a penetrating liquid that strengthens brittle leather before repair
- Cleaning solution — removes silicone, oils, and wax that prevent adhesion
- Applicator tools — palette knife, sponge, mixing sticks
What the kit boxes don’t tell you: Color matching is the hardest part. Most kits include a limited palette. For anything other than black or tan, you’ll likely need to mix two or three shades. Always test on a hidden area first.
You May Also Like It:
Cracks in Tyre Sidewall – What They Mean and When to Replace the Tyre
Car Door Handle Repair Cost: What You Should Expect to Pay
Car Dent Repair Cost: What You’ll Really Pay in 2026
DIY Car Leather Seat Repair: Step-by-Step
What You’ll Need
- Leather repair kit matched to your seat color
- Isopropyl alcohol (70%+) or specialist leather cleaner
- Clean microfiber cloths
- Masking tape
- Heat gun or hair dryer
- Fine-grit sandpaper (400–600 grit)
- Palette knife or spatula
| Resource | Details |
| Estimated time | 2–4 hours (including drying time) |
| Estimated cost | $20–$80 for DIY supplies |
Stage 1: Clean Thoroughly — Don’t Skip This
This is the step most people rush, and it’s where most repairs fail.
- Vacuum the seat to remove loose debris and grit.
- Wipe down the entire repair area with isopropyl alcohol or a dedicated leather prep cleaner. This removes silicone conditioners, body oils, and any previous products — all of which prevent adhesion.
- Let it dry completely (10–15 minutes minimum).
- Do a “tape test”: press masking tape firmly onto the repair area and pull it off. If anything comes up, clean again.
Pro tip: If you’ve been using Armor All, coconut oil, or silicone-based leather conditioners, clean the seat at least twice with an alcohol-based cleaner. Silicone is invisible and lethal to adhesion.
Stage 2: Prep the Damage
For cracks: Gently clean inside the crack with a cotton swab dipped in isopropyl alcohol. If the leather is brittle, apply a leather binder first — let it dry. This strengthens weakened leather fibers before you fill.
For tears and rips: Trim any loose, fraying edges with small scissors. Don’t pull — cut cleanly. If the tear is larger than 1 inch, cut a canvas backing patch slightly larger than the tear and slide it underneath the torn leather using a palette knife. Apply leather adhesive to bond the canvas to the back of the leather. Let it tack for 5 minutes.
For holes: Use the canvas patch method above. The patch becomes the base the filler bonds to.
Stage 3: Apply the Filler
- Mask off the surrounding area with tape to keep edges clean.
- Apply a thin layer of leather filler with a palette knife — don’t try to fill everything in one pass.
- Use the heat gun on low (or a hair dryer) to cure each layer for 1–2 minutes.
- Apply 3–5 thin layers total until the repair is level with the surrounding leather.
- Once dry, sand gently with 400–600 grit sandpaper to smooth any ridges.
Critical warning: Never apply one thick layer of filler. Thick applications crack as they dry and will fail within weeks. Thin layers = durable repair.
Stage 4: Match the Texture
This step is what separates a good repair from a visible one. While the last filler layer is still slightly tacky (not wet), press a grain texture pad firmly onto the repair area. The pad imprints a texture that matches the surrounding leather grain. Hold it in place for 30–60 seconds, then lift straight up. Heat gently with the heat gun to set the texture.
Tip: Press the texture pad in the same direction as the surrounding grain. If your kit doesn’t include a matching grain pad, pressing fine-grained leather or a textured latex glove into wet filler can create a similar effect.
Stage 5: Color Matching and Application
This is the trickiest step — especially for beige, cream, grey, or two-tone interiors.
- Mix your colorant to match the surrounding seat. Start with the closest base color and add tints slowly.
- Test on a hidden area (like the back of the seat base) before applying to the repair.
- Apply colorant in thin, light coats — sponge dabbing gives a more natural look than brushing.
- Feather the color slightly beyond the repair edge so there’s no hard line.
For black car leather seat repair: Black is the most forgiving color to match. Most kits include black as a standard shade. Apply 3–4 thin coats for full opacity and a consistent sheen.
Stage 6: Protect and Condition
- Apply a leather sealant or topcoat to protect the repair from UV, friction, and moisture.
- After 48 hours, apply a quality leather conditioner to the entire seat — not just the repair — to keep the leather supple and prevent future cracking.
Cracked vs. Torn vs. Ripped: Which Repair Method Works Best?
| Problem | Recommended Method | Difficulty |
| Cracked car leather seat repair | Leather binder + flexible filler + color coat | Easy |
| Torn car leather seat repair | Canvas sub-patch + filler + texture + color | Moderate |
| Ripped car leather seat repair | Backing patch + multi-layer filler + color | Moderate |
| Scuffs and fading | Recoloring balm only | Very Easy |
| Peeling faux leather | Professional reupholstery or vinyl wrap | Difficult |
Best Car Leather Seat Repair Kits: What to Look For
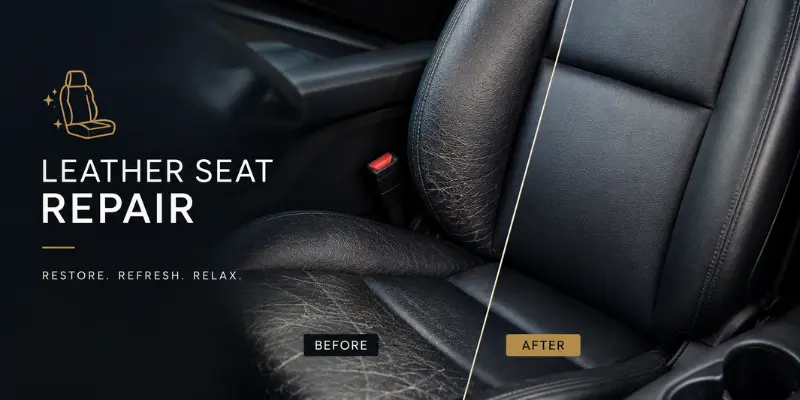
When shopping for the best car leather seat repair kit, prioritize these features:
- Flexible filler — rigid fillers crack under the constant flexing of car seats
- Color mixing options — more tints = better matching
- Heat-cure capability — heat-activation produces more durable repairs
- Grain texture pads — essential for a natural-looking finish
- Instructions specific to car seats (not just furniture)
Avoid: Very cheap single-tube kits under $10. They typically use a rigid compound that cracks quickly and include no texture pads or colorant.
Car Leather Seat Repair Cost: DIY vs. Professional
One of the most common questions: how much does car leather seat repair actually cost? Here’s an honest breakdown.
DIY Costs
| Item | Estimated Cost |
| Basic repair kit | $20–$40 |
| Premium repair kit | $50–$100 |
| Leather binder (if needed separately) | $15–$25 |
| Leather conditioner | $10–$20 |
| Total DIY | $30–$120 |
Professional Repair Shop Costs
| Service | Estimated Cost |
| Small crack or scuff repair | $75–$150 per seat |
| Tear or rip repair (single seat) | $150–$300 |
| Full seat panel replacement | $300–$600+ per seat |
| Full interior reupholstery | $1,500–$4,000+ |
Mobile car leather seat repair — where a technician comes to you — typically costs 10–20% more than a shop visit but saves you time and is convenient. Search “mobile car leather seat repair near me” to find local technicians who come to your home or office.
When to DIY and When to Call a Professional
Go DIY if:
- The damage is smaller than a playing card
- The leather is genuine (not peeling bonded leather)
- You have patience for thin, layered application
- You’re willing to do a test patch first
Call a professional if:
- The damage covers a large area (full seat panel or cushion)
- The leather is peeling or delaminating — surface kits cannot fix this permanently
- You need a color match on an unusual or two-tone interior
- The vehicle is a luxury car where appearances are critical
- Multiple seats need repair (often more cost-effective to get a shop quote)
Regional Buyer’s Guide
Canadian Tire: Car leather seat repair at Canadian Tire is available through their auto care centers. They also stock DIY leather repair kits in the auto detailing aisle. Brands like MastaPlasta and Leather Magic are commonly available.
Halfords (UK): Halfords stocks a range of repair kits including Granville and Teroson branded products. Some Halfords Autocentres offer professional leather repair services in addition to DIY kits.
Singapore: Specialist auto upholstery workshops and detailing centers are widely available. Expect to pay SGD 80–200 per seat for professional repair.
Malaysia: Auto upholstery shops offer competitive pricing. Expect MYR 100–300 depending on damage severity. DIY kits are available through Shopee, Lazada, and auto parts stores.
Mistakes to Avoid (That Most Guides Don’t Mention)
1. Using furniture kits on car seats. Car seats flex constantly. Furniture repair compounds are too rigid and will crack within weeks. Always use automotive-rated or “flexible” filler.
2. Skipping the leather binder on cracked seats. If the leather is brittle, applying filler directly won’t hold. The binder strengthens leather so the filler actually adheres.
3. Applying too much heat. A heat gun cures the repair — but too much heat can shrink, bubble, or crack leather. Keep the gun moving and use a low setting.
4. Color matching in low light. Always review colors in natural daylight. Fluorescent lighting distorts most colors versus how they appear in your car.
5. Conditioning too soon. Wait at least 48 hours after color application before conditioning. Conditioning too early softens the colorant before it sets.
6. Ignoring the rest of the seat. Condition the entire seat — not just the repair — to prevent new cracks from forming in the surrounding leather.
How to Prevent Future Leather Seat Damage
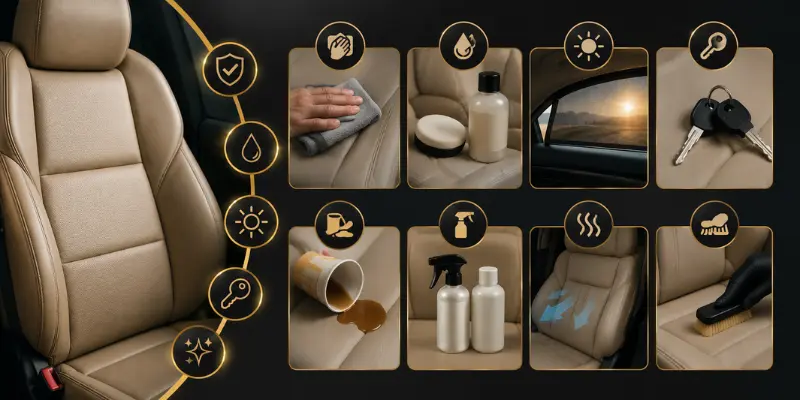
- Condition every 3–4 months with a quality, pH-balanced leather conditioner to keep leather supple.
- Park in the shade or use a sunshade. UV rays are the #1 cause of leather degradation.
- Clean spills immediately. Liquids — especially acidic drinks like coffee — permanently damage leather if left to sit.
- Avoid silicone-based products. They leave residue that prevents proper conditioning and makes future repairs nearly impossible.
- Never use household cleaners like baby wipes, Windex, or all-purpose sprays. Most are too alkaline for leather.
FAQs
Yes, but it takes patience. Rips larger than 2–3 inches require a canvas backing patch and multiple filler layers. The result can look excellent with proper technique, though very large damage areas may benefit from professional repair.
A properly executed repair — with thin layers, correct texture, and sealed color — can last 3–5 years with regular maintenance. Skipping steps or using low-quality products shortens this significantly.
Absolutely. Black car leather seat repair is actually the easiest color to work with. Black is forgiving of minor color variation and is widely available in repair kits.
Typically no — seat wear and tear is excluded from most manufacturer warranties. Some extended warranties or dealer protection plans may cover it. Check your documentation.
If genuine leather is peeling, it’s usually a top-coat failure that can be repaired. If bonded leather or PU leather is peeling, the material itself is degrading. Surface repair is a short-term fix only — replacement is the longer-lasting solution.
Final Thoughts
Car leather seat repair is absolutely within reach for most people. The key is diagnosis first, patience second, and thin layers always.
Whether you choose a DIY car leather seat repair kit for small cracks and scuffs, a mobile car leather seat repair service for convenience, or a professional car leather seat repair shop for major damage — the worst option is always to do nothing. Small cracks become large tears, and leather that’s left dry and unprotected deteriorates fast.
Fix it now, condition it regularly, and your seats will last the life of the car.
You May Also Like It:
Rear Differential Repair Cost – Signs, Fixes, and How to Avoid a Huge Repair Bill
Car Door Lock Repair: Common Problems, Costs, and Easy Fixes
What Oil Does My Car Take? The Complete Guide to Choosing the Right Engine Oil


- Be Respectful
- Stay Relevant
- Stay Positive
- True Feedback
- Encourage Discussion
- Avoid Spamming
- No Fake News
- Don't Copy-Paste
- No Personal Attacks
- Be Respectful
- Stay Relevant
- Stay Positive
- True Feedback
- Encourage Discussion
- Avoid Spamming
- No Fake News
- Don't Copy-Paste
- No Personal Attacks
